Canned Ham Message Board


Click here to leave a message. Keep it short and Type it exactly as you want it to be seen.


Last Updated August 2nd, 2010


Perma-Message
from: The Webmaster


Welcome To The Message Board

Hi Folks,

First off, thanks a bunch for visiting my website. My goal is to create a helpful place where people can learn to restore their own trailers or at least to be able to purchase one with some inside knowlege that will help them make choices and determine value. Whether you wish to restore a trailer or just purchase one ready to go, I hope the information stored here on these pages will help you out in some small way.

The Message Board is a place to ask questions, get answers, share photos or news and events. Please keep it short and to the point and check your spelling and punctuation before submitting.

I'll do my best to keep up with the traffic and I hope you find this board helpful in your quest.

Happy Camping,
Larry / Webmaster


Message Posted 8-02-10
from: Leif


The Collection Is Growing

Hi Larry,

Just thought I would shoot you a quick video of the collection. Seems I'm hooked!

Leif


Message Posted 8-02-10
from: Frank


Question About The Ceiling Vent

I was watching all your video's today on your current restoration of the Deville. During one of them you made a statement about the ceiling vent. You said after it is repaired that the crank should be removed and placed in a drawer. That our best bet was to never open it again & that would prevent alot of problems. If that's the case then what purpose was the vent intended for & can it be removed all together?

.....thank you!

Frank

Hi Frank,

Good question.

The vent has an intended purpose however many people leave it open when not in use and that is bad. Water will get in from rain and ruin the ceiling and floor. And if the vent is not closed tight enough, it will do the same thing. That is why I prefer to just close it and leave it closed and if it get's too warm while camping then I can retreve the vent crank from the drawer and open it. But before moving again I must close it tight. Opening the vent while in storage or not in use is not a good idea. You forget about it and when it rains it ruins the floor and ceiling.

As far as closing it up is concerned, yes you can do that. Just put a piece of aluminum over the hole and putty tape it like the vent. Screw it in and it's done. On the other side put a light in there or cover it up with matching wood panel.

Larry

Another Point Of View

In my Mobile Scout, DeVille, Avion, and Shasta, the ceiling vents are either directly over, or very close to the stove. We have noticed when we fire-up the stove in the morning to perk the coffee (two pots at once) that the ceiling vents helps a lot in venting the fumes and heat. Maybe that is one reason for opening the ceiling vents? For cooking?

The same goes for using the oven. My wife likes to make garlic bread and french dips in it.

Just my two and a half cents.

Leif


Message Posted 7-25-10
from: Beth in SC


My 59 Shasta

Thanks for this site! What is the best way to locate a leak. If it drips inside the ceiling in one spot, how do I track it back to the exterior.? Also, I need a screen door for my '59 Shasta. Do you know of anyone on in the Carolinas that restore these campers?

Thanks
Beth in SC

I build new screen doors for my trailers if the old one is missing or damaged too much. I will be doing a video series on that very soon. You may wish to check my links for people in or around SC. Also please visit www.tincantourists.com. They have links gallore. The leaks are either at the seams or at the openings like the vent opening. Best way to seal that is remove the vent and replace the putty tape. For seam leaks use Plas-T-Cote available at any RV center.

Larry


Message Posted 6-25-10
from: Donnie Misiano


Howdy Folks

Been looking at your web site. You do nice work. I've been doin this myself for about year an a half as a hobby. I've done about 15 trailers. Look at my web site and tell me what you think.

ALWAYS HAVIN FUN! www.canhamalley.com
Donnie


Message Posted 6-15-10
from: CC


First Canned Ham Project

Hi all, Yesterday I purchased my first canned ham,a 1964 Deville. I'm sure I'll be visiting this site a LOT in the coming months as I start my own restoration/renovation.

Thanks.....
cc


Message Posted 5-12-10
from: Leif Berglund


Shellac Ramblings by Leif Berglund

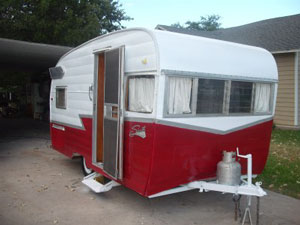
Some observations made while refinishing the cabinets in the Mobile Scout.

The front framing of the kitchen base cabinet that sits on the floor is solid fir, so I was able to sand the old finish down with 120 grit sand paper on a B&D mouse sander. I sanded down the birch plywood door fronts using either 120 or 200 grit depending on how thick the veneer appeared to still be. Just applying new shellac over the old made it look dirty and brought out the scratches even more.

I used clear with a touch of the amber for a lighter shade to try and match the few older birch wall panels that I did not have to replace. Then I read somewhere that you can refresh older shellac by using denatured alcohol on a rag and wiping it on. That made the old panels it look good last year, but faded back to dingy over the Winter. So, I thought it would be a good idea to put on a thin coat of clear with a foam roller on the old ceiling and wall panels last week.


Observations:


  • 1) Clear shellac over old birch ceiling panels darkens the birch a LOT - almost brown.

  • 2) If you do use clear over old birch, you will need to put several coats of straight amber on the adjacent panels to blend them better.

  • 3) While bending over to shellac a lower cupboard, don't back into the very large wall panel behind you that you just coated 10 minutes ago.

  • 4) The denatured alcohol flashes out of the shellac VERY quickly if you have a ceramic space heater going in the trailer. You have to keep thinning it down every 5 minutes or so.

  • 5) A thick shellac coat looks like crap. You have to wipe it off with a rag and denatured alcohol and do all it over.

  • 6) A little clear shellac on old cabinet hardware makes them look brand new - no need to polish them.

  • 7) Even doing this with all of the trailer windows open, everything will smell and taste like shellac to you for 2 days.

  • 8) Trying to shellac new gimp without getting any on the wall or ceiling panels is tough. Maybe it should be shellacked before install.

  • 9) Shellacking ceiling panels in the front and rear that have a curve is tough with a large roller. The wood grain is horizontal, but the curve it vertical. Use a small, short roller.

  • 10) The newer cans of Bulls Eye Shellac only have a lot # printed on the can- no manufacture date anymore. How to tell age? My hardware store still has some older cans from 2004 on the shelf.

  • 11) I use fine steel wool in between coats.

  • 12) I shellacked the new ceiling and wall panels in the garage on a pair of saw horses before I installed them in the trailer. It made for a nice flat horizontal surface so I could use a foam roller. So no runs, drips, or errors. Plus, the shellac is a pretty tough coating that actually helped resist scuffing and scratching the panel when installing it.

    Leif


  • Click here to leave a message. Keep it short and Type it exactly as you want it to be seen.